A well-painted metal fence can transform your property's curb appeal while protecting your investment for years to come. Whether you're refreshing an existing fence or preparing a new installation, proper painting techniques make all the difference between a professional-looking finish and a project you'll regret.
Metal fences face unique challenges. They're exposed to harsh weather conditions, temperature fluctuations, and moisture that can cause rust and deterioration. Without proper preparation and painting, even the highest-quality metal fencing can look worn and damaged within just a few years.
This comprehensive guide will walk you through every step of painting your metal fence, from initial preparation to final touches. You'll learn about the best products to use, common mistakes to avoid, and professional techniques that ensure long-lasting results.
Why Proper Metal Fence Painting Matters
Metal fences represent a significant investment in your property. Unlike wood fences that may need replacement every 10-15 years, a properly maintained metal fence can last decades. The key to longevity lies in protection from rust and corrosion.
Paint serves as more than just decoration. It creates a protective barrier that prevents moisture from reaching the metal surface. When applied correctly, quality paint can extend your fence's lifespan by 15-20 years or more.
Beyond protection, a freshly painted fence enhances your property value. Real estate professionals consistently note that well-maintained fencing contributes to positive first impressions and can increase property values by 10-15%.
Essential Tools and Materials
Before starting your painting project, gather these essential supplies:
Cleaning Supplies:
- Wire brushes (various sizes)
- Sandpaper (120-grit and 220-grit)
- Power washer or garden hose
- Degreasing cleaner
- Drop cloths
- Rags or towels
Painting Equipment:
- High-quality brushes (angled and straight)
- Foam rollers
- Paint sprayer (optional but recommended for large projects)
- Primer specifically designed for metal surfaces
- Exterior metal paint
- Painter's tape
- Plastic sheeting
Safety Gear:
- Safety glasses
- Work gloves
- Dust mask or respirator
- Non-slip shoes
Step-by-Step Painting Process
Preparation: The Foundation of Success
Proper preparation determines whether your paint job lasts two years or twenty. Start by thoroughly cleaning your fence. Remove all dirt, debris, and vegetation growing near the fence line.
Use a power washer to remove loose paint, rust, and grime. Hold the nozzle 12-18 inches from the surface and work systematically from top to bottom. Allow 24-48 hours for complete drying before proceeding.
Next, inspect every inch of your fence for rust spots, scratches, or damage. Sand these areas with 120-grit sandpaper until you reach clean metal. For heavily rusted sections, consider using a rust converter product that chemically neutralizes rust and creates a paintable surface.
After sanding, wipe down the entire fence with a degreasing cleaner to remove any residual oils or contaminants. This step is crucial for proper paint adhesion.
Priming: Your Paint's Best Friend
Never skip primer when painting metal fences. Primer creates the bond between your fence and the topcoat while providing additional rust protection.
Choose a primer specifically formulated for metal surfaces. Look for products that offer rust inhibition and are compatible with your chosen topcoat. Apply primer in thin, even coats using a brush or roller. Pay special attention to joints, corners, and areas where water might collect.
Allow the primer to cure according to manufacturer instructions. This typically takes 4-6 hours in moderate temperatures, but humidity and temperature can affect drying times.
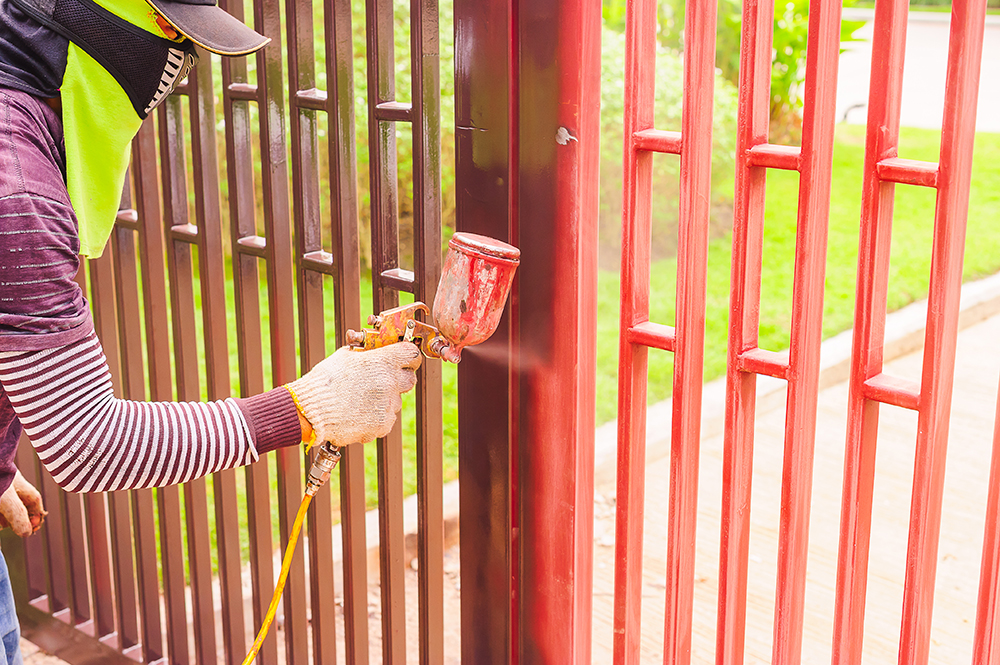
Applying the Topcoat
Select a high-quality exterior paint designed for metal surfaces. Acrylic latex paints offer excellent durability and weather resistance while being easier to clean up than oil-based alternatives.
Apply paint in thin, even coats rather than trying to cover everything in one thick application. Start at the top of each section and work downward, maintaining a wet edge to avoid lap marks.
For best results, apply two coats of paint. The first coat seals the primer and provides base coverage. The second coat ensures complete coverage and maximum protection.
Choosing the Right Paint
The paint you choose significantly impacts your project's success. Consider these factors:
Paint Type:
- Acrylic latex: Easy application, quick drying, excellent durability
- Oil-based: Superior adhesion, longer drying time, more challenging cleanup
- Specialty metal paints: Formulated specifically for metal surfaces
Color Considerations:
Light colors reflect heat and may last longer in sunny climates. Dark colors absorb heat, which can cause expansion and contraction that stresses the paint film.
Quality Matters:
Premium paints contain higher concentrations of pigments and resins, providing better coverage and longer-lasting protection. While they cost more initially, they often prove more economical over time.
Common Mistakes to Avoid
Many DIY painters make errors that compromise their results. Avoid these common pitfalls:
Inadequate Surface Preparation:
Rushing through cleaning and sanding leads to poor paint adhesion and premature failure.
Skipping Primer:
Primer isn't optional for metal surfaces. It's essential for proper adhesion and rust prevention.
Painting in Poor Weather:
Avoid painting during high humidity, extreme temperatures, or when rain is forecasted within 24 hours.
Applying Paint Too Thick:
Thick coats may look good initially but are more likely to sag, drip, or peel over time.
Ignoring Manufacturer Instructions:
Each product has specific application requirements. Following these guidelines ensures optimal performance.
Maintenance for Long-Lasting Results
Regular maintenance keeps your painted fence looking great and extends its lifespan:
Annual Inspection:
Check for chips, scratches, or signs of rust. Address small problems before they become major issues.
Gentle Cleaning:
Wash your fence annually with mild soap and water. Avoid harsh chemicals or abrasive cleaners that can damage the paint.
Touch-Up Painting:
Keep leftover paint for touch-ups. Small chips and scratches should be addressed promptly to prevent rust formation.
Vegetation Management:
Keep plants and sprinklers away from your fence. Constant moisture exposure accelerates paint deterioration.
When to Call Professional Fencing Contractors
While painting a metal fence is a manageable DIY project, certain situations warrant professional help:
Large or Complex Fences:
Extensive fencing projects require significant time and equipment investments. Professional contractors have the tools and experience to complete large jobs efficiently.
Severe Rust or Damage:
Fences with extensive rust damage may require specialized treatments or partial replacement. Professional assessment can determine the most cost-effective approach.
Height or Access Issues:
Tall fences or those in difficult-to-reach areas pose safety risks for amateur painters. Professional contractors have the proper equipment and safety training.
Time Constraints:
Professional painting crews can complete projects much faster than DIY efforts, minimizing disruption to your routine.
Your Fence Investment Deserves Professional Care
A properly painted metal fence protects your property investment while enhancing its appearance. Following these guidelines helps ensure professional-quality results that last for years.
Remember that preparation is key to success. Taking time to properly clean, sand, and prime your fence creates the foundation for a beautiful, durable finish. Quality materials and careful application techniques complete the process.
If you're looking for fencing contractors in Palm Coast, FL, contact Masters Quality Fence today to get a quote. Our experienced team can handle everything from new fence installation to professional painting services, ensuring your fence looks great and provides lasting protection for your property.